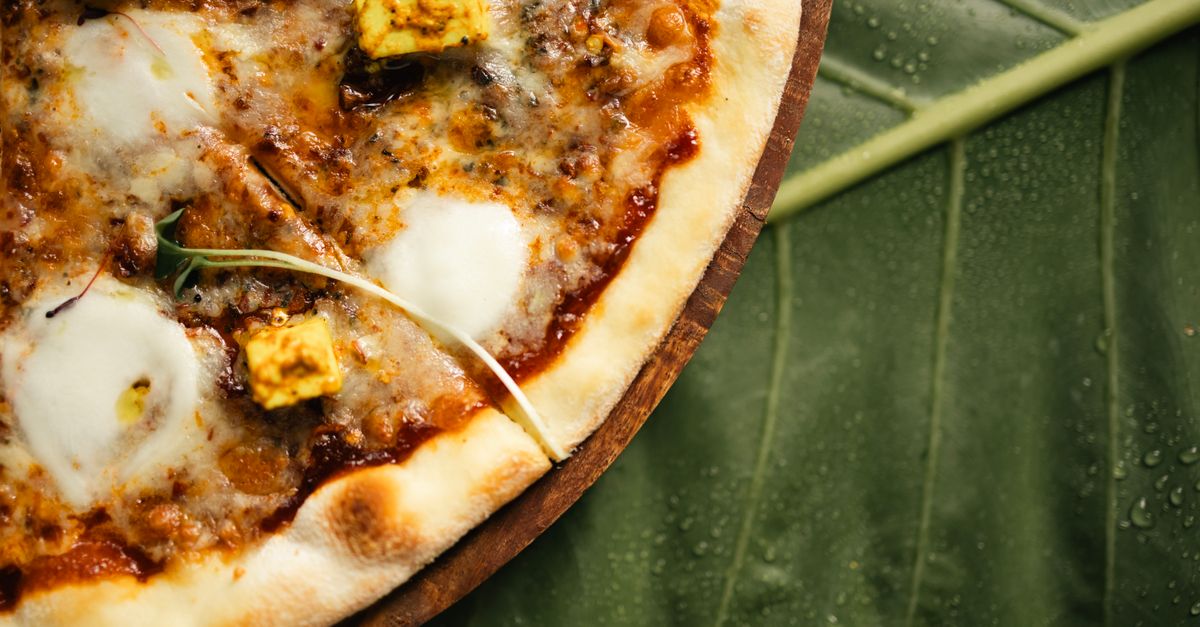
Why Your Homemade Pizza Crust Lacks Flavor (And The Simple Shifts That Deliver Pizzeria-Quality Taste)
You’ve spent the evening meticulously shaping dough, layering on fresh sauce, cheese, and toppings, only to pull a golden-brown pizza from the oven that looks picture-perfect. But then you take that first bite, and while it’s good, there’s something missing. That deep, satisfying, complex flavor you get from a great pizzeria crust just isn’t there. It’s bland, a mere vehicle for the toppings rather than a star in its own right. Sound familiar? I’ve been there countless times. For years, my homemade pizzas were consistently ‘okay’ but never truly exceptional. I blamed my oven, my flour, even the phase of the moon. What I eventually realized, after much experimentation and more than a few disappointing pies, was that I was overlooking the most crucial elements that build flavor directly into the crust itself.
The mistake I see most often, and one I made for far too long, is treating pizza dough as a blank slate. We focus so much on the toppings that the foundation, the very heart of the pizza, gets neglected. Professional pizzerias understand that the crust isn’t just about texture; it’s about a complex interplay of savory, tangy, and sometimes even subtly sweet notes that elevate every bite. What changed everything for me wasn’t a magic ingredient, but a series of intentional shifts in my process, focusing on developing flavor before the pizza even hits the oven. These aren’t complicated techniques, but they require a conscious departure from the ‘mix-and-bake’ mentality.
Key Takeaways
- Utilize a longer, colder fermentation to develop a richer, more complex flavor profile in your pizza dough.
- Incorporate a small amount of an aged, flavorful fat like olive oil, butter, or even rendered bacon fat directly into the dough.
- Enhance umami and depth by adding a pinch of diastatic malt powder or a touch of miso paste to your dough.
- Master the art of the ‘salt sandwich’ and ensure proper seasoning throughout the entire dough-making process.
The Overlooked Power of Slow Fermentation: Time is Flavor
The biggest game-changer for my pizza crust, hands down, was embracing cold fermentation. For years, I followed recipes that called for a quick 1-2 hour rise at room temperature. The dough would double in size, sure, but the resulting crust was consistently one-dimensional. It lacked that distinctive tang and depth that makes you want to eat the crust first.
Here’s the science: yeast, when given time and a cooler environment (like your refrigerator, typically 38-42°F or 3-5°C), works much more slowly. This extended period allows the yeast to produce a wider range of organic acids and esters, which are the flavor compounds responsible for that complex, sourdough-like tang and aroma. A quick rise produces mostly alcohol, which bakes off, leaving less flavor behind.
In my experience, a minimum of 24 hours, and ideally 48-72 hours, in the refrigerator completely transforms the dough. I simply mix my dough, knead it for a few minutes until smooth, lightly oil it, and then place it in a covered bowl in the fridge. The difference is stark. After just one day, the dough develops a subtle aroma. By day two or three, it smells deeply yeasty, slightly alcoholic, and wonderfully complex. This isn’t just about the scent; those aromas translate directly into the baked crust, providing a flavor foundation that no quick rise can replicate. Plan ahead, and let time do the heavy lifting for your flavor development.
Fat is Your Friend: Integrating Flavorful Oils
Many traditional Neapolitan-style pizza doughs are purists: just flour, water, salt, and yeast. And while that can produce an incredible crust in a 900°F oven, most home ovens struggle to replicate that speed and char. For the home cook, adding a touch of fat can dramatically improve both flavor and texture, especially at lower temperatures. The mistake I made was thinking any fat would do, or worse, skipping it altogether. The quality and type of fat matter immensely.
I recommend incorporating 1-2 tablespoons of a high-quality extra virgin olive oil per 500 grams (about 4 cups) of flour. Don’t just drizzle it on the bowl for greasing; mix it directly into the dough. This adds a subtle richness and a fruity, sometimes peppery, note that complements the other flavors. The olive oil also contributes to a more tender crumb and a slightly crispier crust, as the fats help inhibit gluten development a tiny bit, and brown more effectively.
But don’t stop there. I’ve experimented with other fats that bring unique flavor profiles: a tablespoon of melted butter for a richer, almost brioche-like undertone (fantastic with savory toppings like caramelized onions or mushrooms), or even a tiny bit of rendered bacon fat for a smoky, umami punch (perfect for a meat-lovers pizza). The key is to think about the flavor profile of your final pizza and choose a fat that will enhance it. Adding the fat early in the mixing process allows it to fully integrate, lending its character throughout the entire dough structure.
The Umami Secret Weapon: Diastatic Malt & Miso
This is where things get truly interesting and where you can elevate your crust beyond what most home cooks achieve. Professional bakeries often use ingredients that enhance flavor and browning without being overtly noticeable. For pizza, that means tapping into the power of umami.
My top recommendation is diastatic malt powder. This magical ingredient, available online or at specialty baking stores, contains enzymes that break down starches into sugars, providing more food for the yeast and, crucially, more sugars available for caramelization (Maillard reaction) during baking. A teaspoon per 500 grams of flour will lead to a darker, more beautifully blistered crust with a subtly sweeter, more complex flavor profile that hints at artisanal bread. It’s not just about color; it’s about a depth of flavor you can almost taste in the rich aroma.
For an even deeper, savory umami bomb, I sometimes add a teaspoon of white miso paste (shipped safely, it stores well in the fridge). Miso, being a fermented soybean paste, brings incredible savory depth. It’s a trick I learned from high-end bread bakers. Dissolve it in a small portion of your dough’s water before adding to the dry ingredients. The salt content of the miso needs to be accounted for, so reduce your added salt slightly (perhaps by a quarter teaspoon). The result is a crust with an almost meaty savoriness, particularly striking with mushroom or sausage toppings.
These ingredients don’t scream ‘miso pizza’ or ‘malt pizza’; they quietly work in the background, making your crust more of itself, enhancing its natural flavors and giving it that elusive ‘something special’ that differentiates pizzeria quality from homemade.
Salt: Not Just for Seasoning, But for Structure and Taste
Salt is arguably the most critical ingredient for flavor in anything, and pizza crust is no exception. However, many home bakers either under-salt their dough or add it incorrectly, missing out on its full potential. The mistake I used to make was simply tossing salt in with the flour and hoping for the best. Proper salt incorporation is vital for both flavor and gluten development.
My approach now is what I call the ‘salt sandwich’. When I add yeast to the water, I sprinkle about half of the total salt (roughly 1.5% to 2% of the flour weight, so 7-10 grams for 500g flour) directly into the water with the yeast, ensuring it dissolves. Then, I add the flour, and on top of the flour, I sprinkle the remaining salt. This ensures even distribution and prevents the salt from directly contacting the yeast in high concentrations for too long, which can inhibit its activity early on.
Beyond mixing, it’s crucial to taste your dough. Yes, raw dough. During the kneading process, tear off a tiny piece, taste it, and see if it has enough seasoning. If it tastes bland, it will bake bland. A properly salted dough will taste mildly savory and well-rounded, not overtly salty. Salt strengthens the gluten network, making the dough easier to work with, and enhances all the other flavors developed through fermentation and special additions. Don’t underestimate its power; it’s the conductor of your crust’s flavor orchestra.
Hydration and Flour Choice: The Foundation of Flavor & Texture
While not directly flavor additives, the right hydration and flour choice significantly impact how well those flavor-building elements can shine. For too long, I used standard all-purpose flour and stuck to rigid hydration percentages. This was a missed opportunity.
Flour choice: Opt for a bread flour with a higher protein content (around 12-14%) or, ideally, an Italian ‘00’ flour if you can find it. Bread flour develops stronger gluten, leading to a chewier crust with better structure, allowing for those desirable air pockets and blisters. ‘00’ flour, milled finely, creates an incredibly smooth dough that’s a joy to work with and achieves a crisp, yet tender, texture. The flavor of the flour itself also matters. Some artisanal flours offer nutty or earthy notes that contribute subtly to the final crust. Don’t be afraid to experiment with different brands to find what you like.
Hydration (water percentage relative to flour): This is crucial for texture, which in turn impacts how flavor is perceived. For a home oven, I find a hydration level of 65-70% (e.g., 325-350ml water for 500g flour) to be ideal. Higher hydration results in a stickier dough that can be challenging for beginners, but it also creates a lighter, airier crumb structure with more irregular holes. These open structures allow for better caramelization and crispness, which enhance the overall flavor experience. A dense, tight crumb can taste heavy and mask the delicate flavors you’ve worked so hard to develop. Don’t be afraid to incrementally increase your hydration, learning to handle the stickier dough, as it genuinely unlocks superior crust characteristics.
Frequently Asked Questions
How much salt should I use in my pizza dough?
For 500 grams (about 4 cups) of flour, I recommend using 7-10 grams of fine sea salt, which is roughly 1.5% to 2% of the flour’s weight. Adjust slightly based on any salty additions like miso, and taste your dough during kneading.
Can I use regular all-purpose flour for these techniques?
Yes, you can. While bread flour or ‘00’ flour will yield superior results, these techniques (cold fermentation, fat addition, umami boosters) will still significantly improve the flavor of dough made with all-purpose flour. You might notice a slightly less chewy texture, but the taste will be much better.
How long can I cold ferment my dough?
I find the sweet spot for flavor development in the refrigerator is 24-72 hours. You can push it to 5 days, but beyond that, the yeast might start to exhaust its food supply, and the dough can become overly sour or lose its rise. Always bring the dough to room temperature for at least 1-2 hours before shaping.
What if I don’t have diastatic malt powder?
If you don’t have diastatic malt powder, you can skip it, but your crust might not brown as deeply or develop the same subtle sweetness. A small pinch of sugar (1/2 teaspoon per 500g flour) can aid browning, but it won’t replicate the enzymatic action or complex flavor contribution of malt.
How do I prevent my high-hydration dough from being too sticky?
Hands-on practice is key. Use wet hands or lightly oiled hands when working with sticky dough. Techniques like “stretch and fold” in the bowl (instead of aggressive kneading on a floured surface) can help develop gluten without adding too much flour, which would reduce hydration and make the dough tougher. Don’t over-flour your work surface when shaping; a light dusting is all you need.
Conclusion: Your Journey to Flavorful Crust Starts Now
Transforming your homemade pizza crust from merely ‘good’ to genuinely ‘great’ isn’t about one secret ingredient or a complicated technique. It’s about a series of small, intentional shifts that prioritize flavor development from the very beginning. By embracing slow, cold fermentation, carefully selecting your fats, exploring umami boosters like malt or miso, and mastering the art of salt, you’ll build a foundation that elevates every slice. Don’t be afraid to experiment, taste as you go, and truly engage with the dough. Your next pizza night won’t just look amazing; it will taste incredible, from the crispy edge to the chewy, flavorful center. Get started tonight by mixing up a batch of dough and letting your refrigerator do the work!
Written by Lena Petrova
Home & Practical Living
Lena's expertise in consumer research helps her uncover the most effective and accessible solutions for home and finance.
You Might Also Like

Why Most Beginners Fail at Mastering Photography (And What Actually Works Beyond Auto Mode)
Stuck in auto mode? Discover why common beginner photography advice misses the mark and my layered approach for truly capturing stunning images.
Why Most Beginners Fail at Mastering Photography (And What Actually Works Beyond Auto Mode)
Struggling to move beyond auto mode? Learn the non-obvious reasons beginners fail at photography and the strategic shifts for stunning photos.

Why Most Beginners Fail at Mastering Slow Cooking (And What Actually Works for Effortless Meals)
Discover why most beginners struggle with slow cooking and learn the counter-intuitive techniques that guarantee delicious, stress-free meals every time.